Calculating our bra sizes and learning some general bra fitting best practices to find bras that fit well…

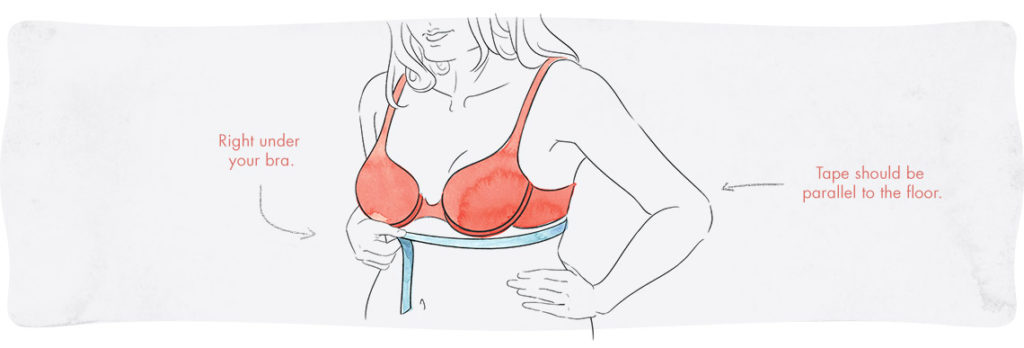
Step 1: Measure your band size.
Want to know the number one mistake bra mistake most women make? Buying bras based on cup size instead of band size. Cup sizes vary based on band size, so it’s so crucial to get an accurate measurement for your band size. To do that simply put on an unpadded bra, firmly measure the area directly beneath your breasts around your ribcage. Be sure to keep the measuring tape flat against your skin and parallel to the ground. Write down that measurement. That’s your band size.
Step 2: Measure your cup size.
With your unpadded bra on, firmly wrap the measuring tape around the fullest part of your chest. Make sure the tape measure is taut and straight. Write down that measurement. That’s your cup size.
Step 3: Enter your measurements into a bra size calculator.
Turns out calculating your real bra size is a complicated endeavor requiring maths and stuff. Ain’t nobody got time for that (except the specialists who are paid to make those calculations). So I’m taking the easy way out here and advising you to enter your digits into this handy bra size calculator from Linda’s Online. It’s the most accurate online calculator I’ve found thus far.

(Optional) Step 4: See a bra specialist.
I say this step is optional only because I know some of you may not be able to see a bra specialist. But really, every woman should see a good bra-fitting specialist at least once in their lives. You may just learn you’ve been wearing the wrong bra size your whole life…
Just as with clothing, sizing and fit can vary by brand. You may be a 36A in one brand and a 34B in another. So it’s important to keep in mind these general tips for determining proper bra fit:
- Two-Finger Strap Test: The straps should fit snugly on your shoulders with enough room for two fingers to slide underneath. Additional tip: the straps shouldn’t dig into your shoulders.
- Fill/Spill Check: You should smoothly fill out your cups so that there is no gaping or wrinkling. If there’s wrinkling or gaping, go up a cup size. If you’re spilling out the top of your bra, go down a cup size.
- Comfort Check: Every part of your bra should feel comfortable on you, particularly while you’re seated (that’s when your rib cage tends to expand).
- Maximum Lift Test: Turn to the side. Your breasts should sit halfway between your shoulders and elbows.
- Center Challenge: The center panel of your bra should lay flat against your sternum without buckling.
- Stretch Test: Raise your arms, bend over, and twist. The band should stay firmly in place and not hike up your back.
- Underwire Check: The underwire shouldn’t poke, protrude, pinch or ride up. If it bends away from your chest in the center, that likely means your cup size is too small.


