Embroidery has been present in various cultures and generations, passing through each family member, who are usually women. And it is that this art is very complex and there are many ways to do it, both in stitches and in designs.
If what you want is to broaden your horizons in terms of embroidery, this article is ideal for you.
Today we bring you 15 embroidery stitches that you can learn in a practical way, following this guide. You will love how simple sewing will be for you from now on.
- Backstitch: Ideal for outlines
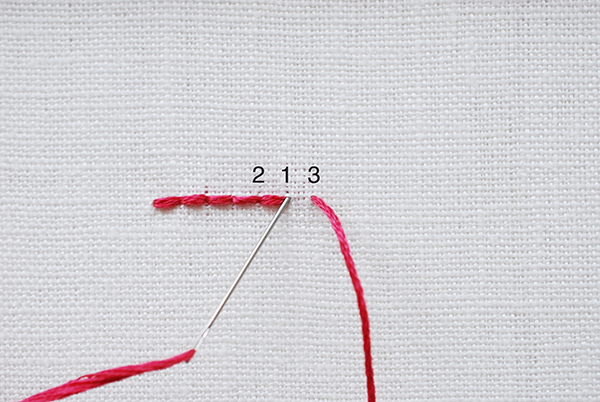
This stitch is one of the most used; come up from the back at point 1, then go down to point 2. Come up to point 3, then go back to point 1 and bring the needle to the back.
- Trellis
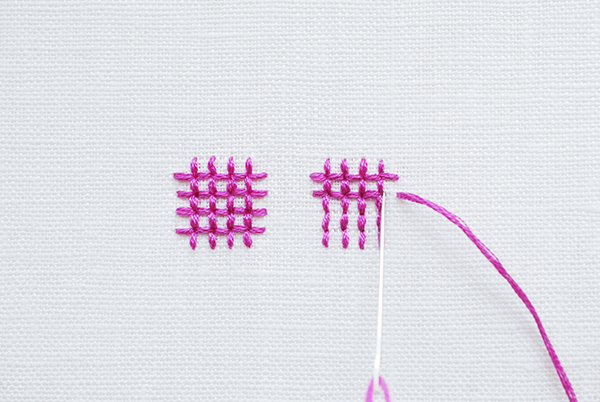
Worked at the fulcrum, this trellis is ideal for filling an area. Try to sew it diagonally to get a true trellis. Sew a set of parallel lines of stitching, keeping the stitch length as consistent as possible. Then sew another set of parallel lines of stitching, perpendicular to the first, and with the ends of the stitches crossing each other.
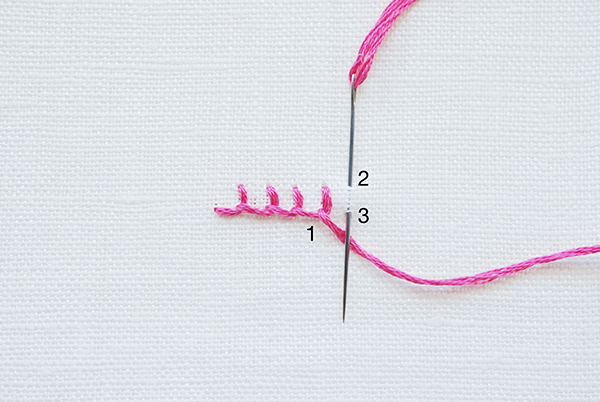
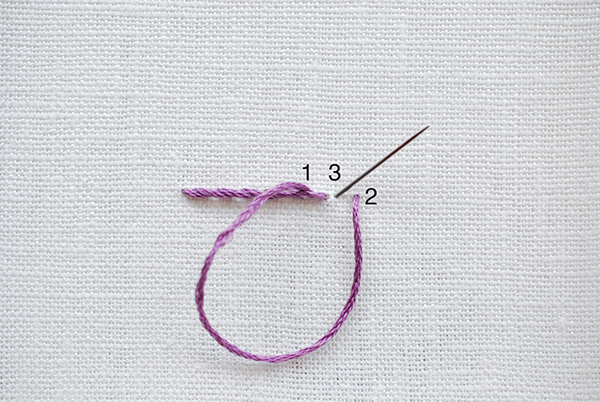
- Blanket stitch (surface)
This is fun for decorative stitching or appliqué. Try to keep the stitch spacing and height constant or change it to create a pattern. Go up to point 1. Go down to point 2 and back to point 3, keeping the needle on the working thread. Pull the thread to create a right angle.
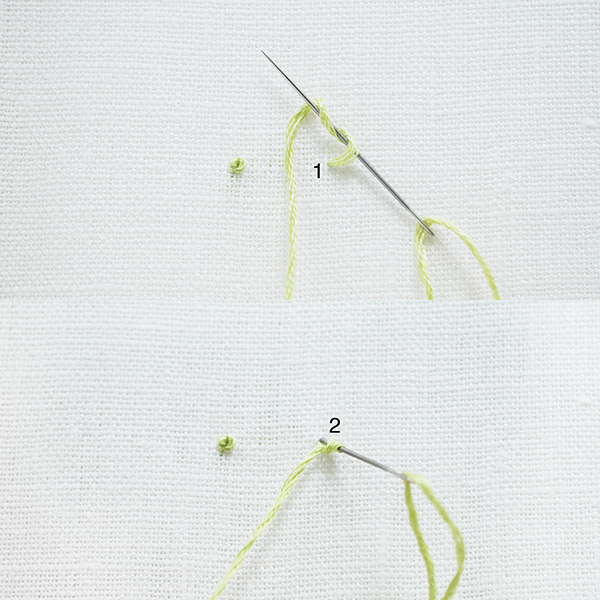
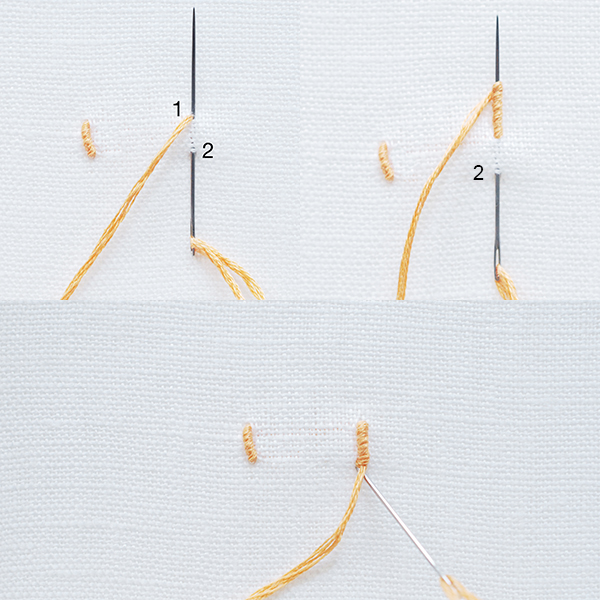
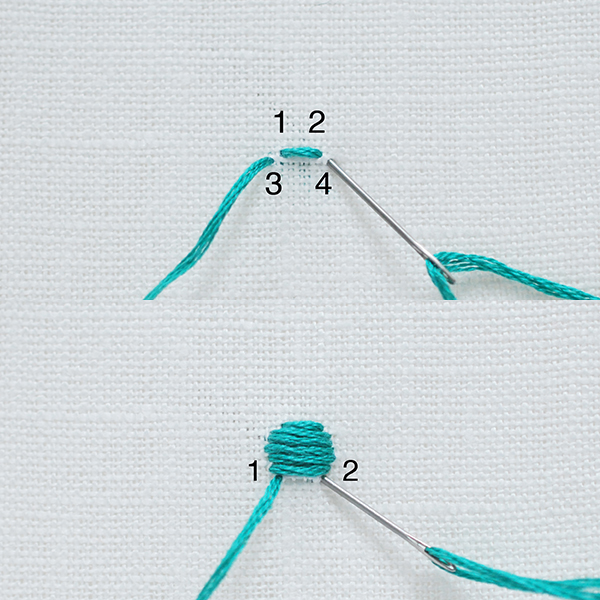
- Bullion Knot
They are difficult at first, but with a little practice, bullion knots are useful for creating texture and beautiful flowers in embroidery. Go up to point 1, then go down to point 2 and back to point 1, keeping the needle through the fabric. Wrap the needle until the wrap is as long as the space between points 1 and 2. If you don’t want the knot to lay flat against the fabric, wrap it a bit more. Holding the wrapper in your non-dominant hand, carefully pull the needle through the wrapped thread. Go down to point 2 and pull the thread until the stitch is right.
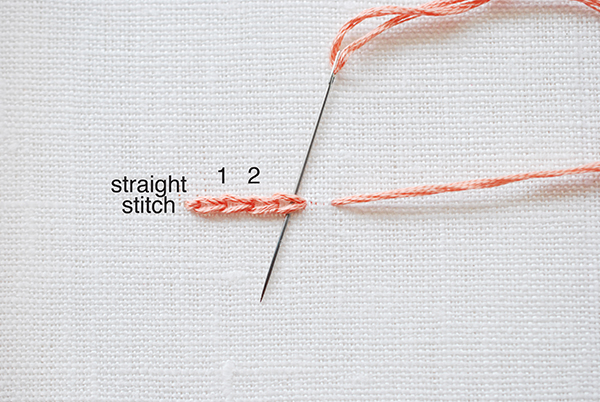
- Chain
This simple chain stitch method is worked in reverse. It’s great for adding texture to your projects. Make a small straight stitch. Go up to point 1, slide the needle under the small straight stitch, then go down to point 1. Go up to point 2, slide the needle under the previous stitch, then go down to point 2.
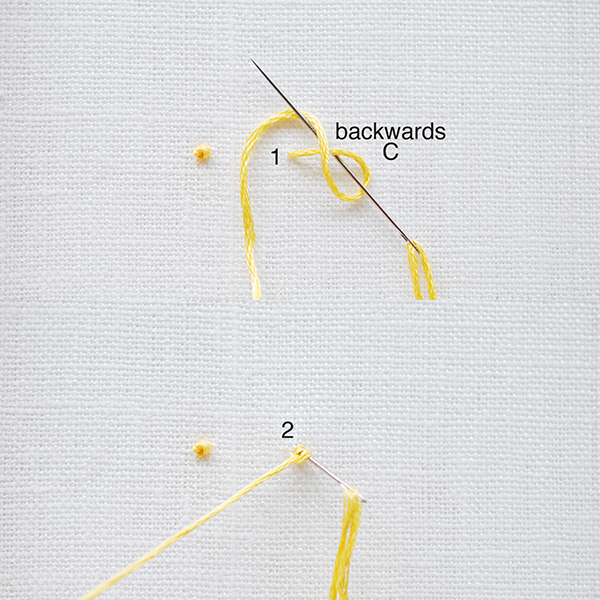
- Colonial Knot
If you find French knots difficult, try this alternative to create eyes and other stitch details. Go up to point 1, form a backward C with the yarn and bring the needle over the C. Wrap the yarn around and then under the point of the needle. While keeping the working thread taut, lower the needle at point 2 (next to point 1, but not in the same hole) and pull slowly until the knot forms.
- French knot
This is a point that everyone should learn, because it is very useful. The secret is to keep the working thread taut as you pull it through. Go to point 1, then wrap the thread around the needle twice. Holding the working thread in your non-dominant hand, lower the needle at point 2 (close to point 1, but not the same hole) and pull slowly until the knot forms.
- Fly stitch
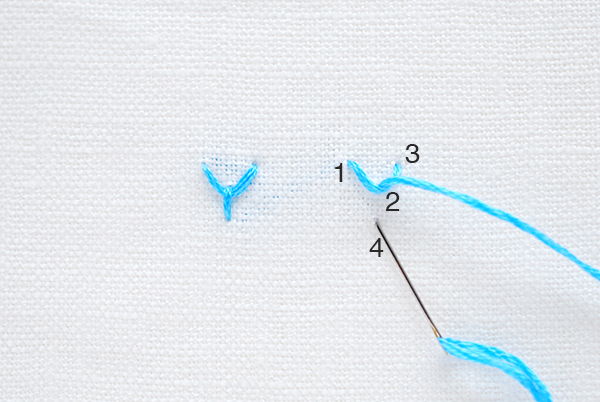
This stitch can be worked as single stitches or in a line. Go up to point 1, then go down to point 2, leaving the thread loose. Come up to point 3, catch the loop of yarn, then pull to form a ‘V’. Go down to point 4.
- Ladder stitch

This stitch is useful for joining closed seams as it creates an almost invisible seam line!
Bring the needle out about 0.5mm below the fold on the inside of one side of the seam. On the opposite side of the seam, just opposite where the thread came out, go into point 1 and back to point 2. Go into point 3 and back to point 4. Work back and forth on each side of the seam, and sew. about .5mm below the fold. Every few stitches, gently tug on the thread to tighten the seam.
10.Lazy Daisy
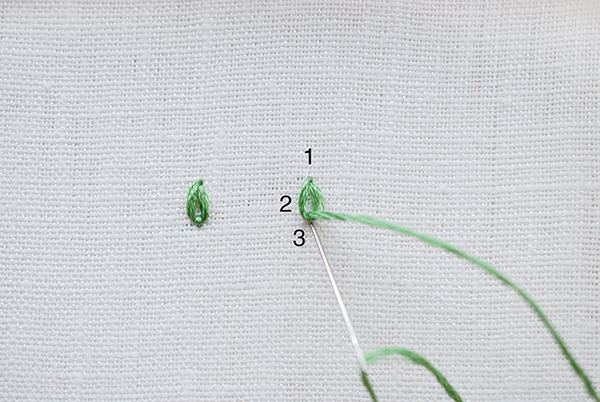
Usually used for flower petals, this stitch is also ideal for embroidering small seeds. Go up to point 1 and then come back leaving a small loop. Go up the loop at point 2, then down to point 3 (next to point 2, but not in the same hole).
- Picot stitch

To create flowers, leaves, feathers and more in your embroidery, picot stitch is the perfect choice. The base is anchored to the fabric, but the rest of the stitch is knit and free of the material.
Place a sewing pin with a large head vertically through the fabric. Bring the needle up at point 1. Bring the working thread behind the pin head and back down at point 2. Return to point 3 next to the pin and centered between points 1 and 2 as possible. Bring the working thread behind the bobby pin head and then pass the needle under, over and under the three vertical threads. Push the thread up. Now, from the side where the working thread comes out, pass the needle over, under and over the vertical threads. Repeat, weaving back and forth, pulling the yarn up each time. When the shape is full, bring the needle to the back of the fabric.
- Whipped spider web
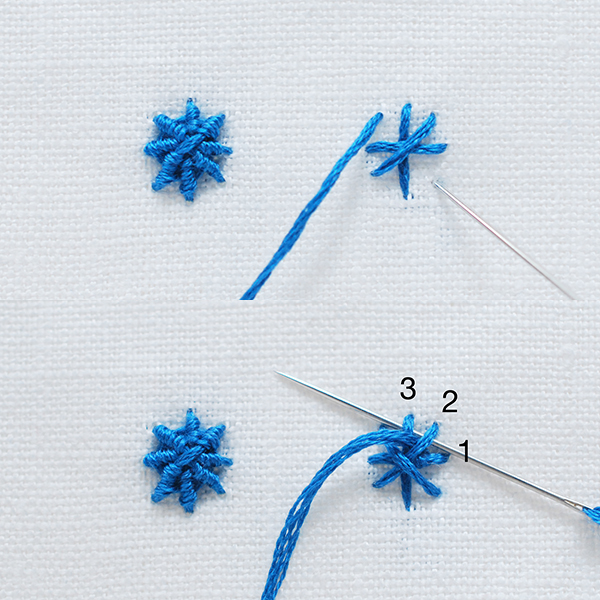
True to its name, this dot looks like a spider’s web, but it also makes wonderful flower shapes. Start with a base of four cross stitches, creating eight spokes. Approach the center, between two spokes. Slide the needle under spokes 1 and 2 without going through the fabric. Pass the needle through spoke 2, then slide the needle under spokes 2 and 3. Continue around all spokes several times until the web is filled.
13.Rose Stitch
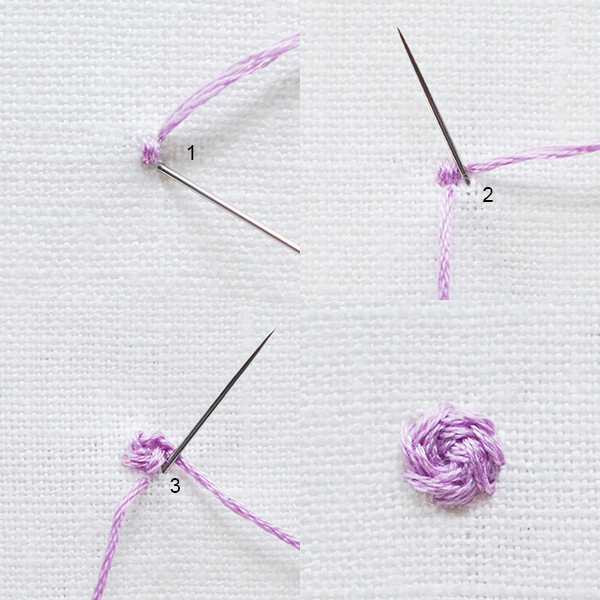
Start with three small parallel dots to form the center. Using stem stitches around the center, work in circles and increase the stitch length until the rose is the desired size. Experiment using materials like string or ribbon.
- Satin Stitch
When you want to fill in an area with a smooth finish, this stitch is the ideal choice. It works best in small areas, because if the stitches are too long, they can catch. Go up to point 1, then go down to point 2. Go up to point 3, then go down to point 4. Repeat. Always work the stitches in the area you are filling in, coming in the opposite direction where the needle came down.
- Stem-stitch
Although it may take some practice, the stem stitch is great for textured outlines. Come up from the back at point 1, then go down to point 2. Before pulling the stitch close to the fabric, go up to point 3 with the thread loose under the needle. Pull the thread down, then repeat. Come up from the back at point 1, then go down to point 2. Before pulling the stitch close to the fabric, go up to point 3 with the thread loose under the needle. Pull the thread down, then repeat.
Source: Molliemakes.co
Leave a reply


